PS/2 to USB convertor from an Arduino
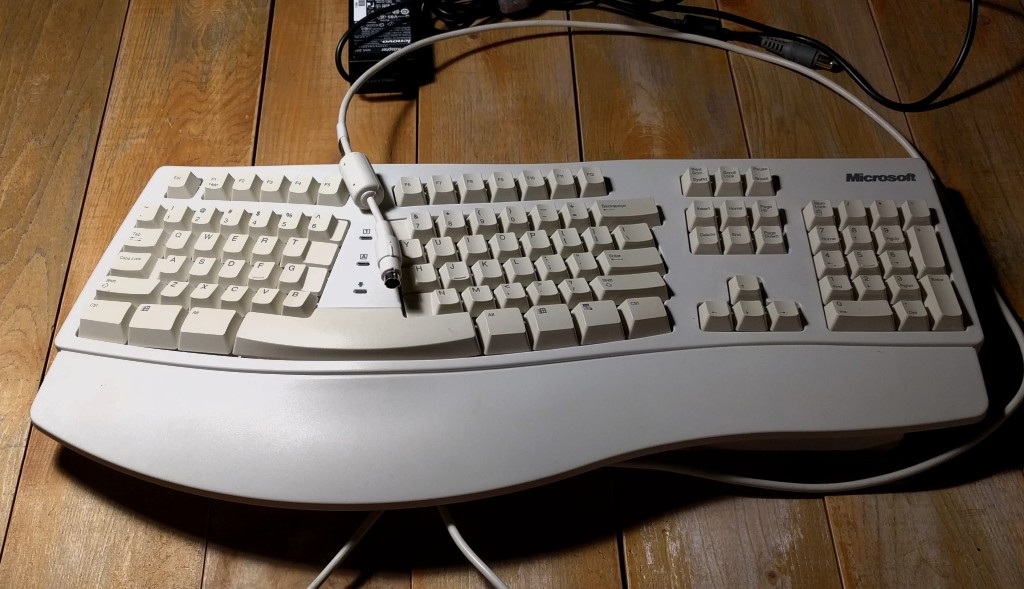
I picked up a 90’s era Microsoft Ergonomic keyboard from Value Village after Christmas 2016. The keyboard is in amazingly good condition and, of course, it’s built like a tank. It’s actually not a mechanical keyboard, my usual preference, but it is worth saving and making useful again.
The First Attempt
At the time I did have one computer which actually still had a PS/2 connector (an HP G5 from 2009-or-so). I tested the keyboard out over PS/2 and all the keys worked. This wasn’t going to have to be a repair, just a conversion.
The last time that I made a PS/2 to USB convertor, I used the excellent [tmk_keyboard][]. That was using an ATmega32U4 microcontroller.
These have USB hardware on board (which is why they are very popular in the keyboard hacking community) and using one to create a PS/2 adaptor is basically a case of flashing [tmk_keyboard][] and soldering the PS/2 wires to some pins.
Back then I had a depleted electronics stash: my container of stuff had arrived from the UK but there was still a load of stuff that I had sold or given away that I hadn’t replaced yet. I didn’t have an ATmega32U4 microcontroller. All I had was Arduino (clones), an FTDI cable and some passive parts.
Despite having very few basic parts, I did actually have a 50MHz oscilloscope, which was a leaving present from iWeb, this was actually pretty useful in diagnosing USB problems.
I compiled tmk_keyboard for the ATmega328p, making sure to edit
Makefile.vusb and change the CPU speed to 16MHz (it defaults to 12MHz). I
didn’t have an ATmega programmer, so I had to just upload it via the Arduino
bootloader.
This meant that when the power turns on to the board there is short pause before the microcontroller executes the convertor firmware. I think this was one of several factors which made the convertor unreliable to the point of useless. The other was not using quite the right diodes, and so voltages were slightly out of specification:
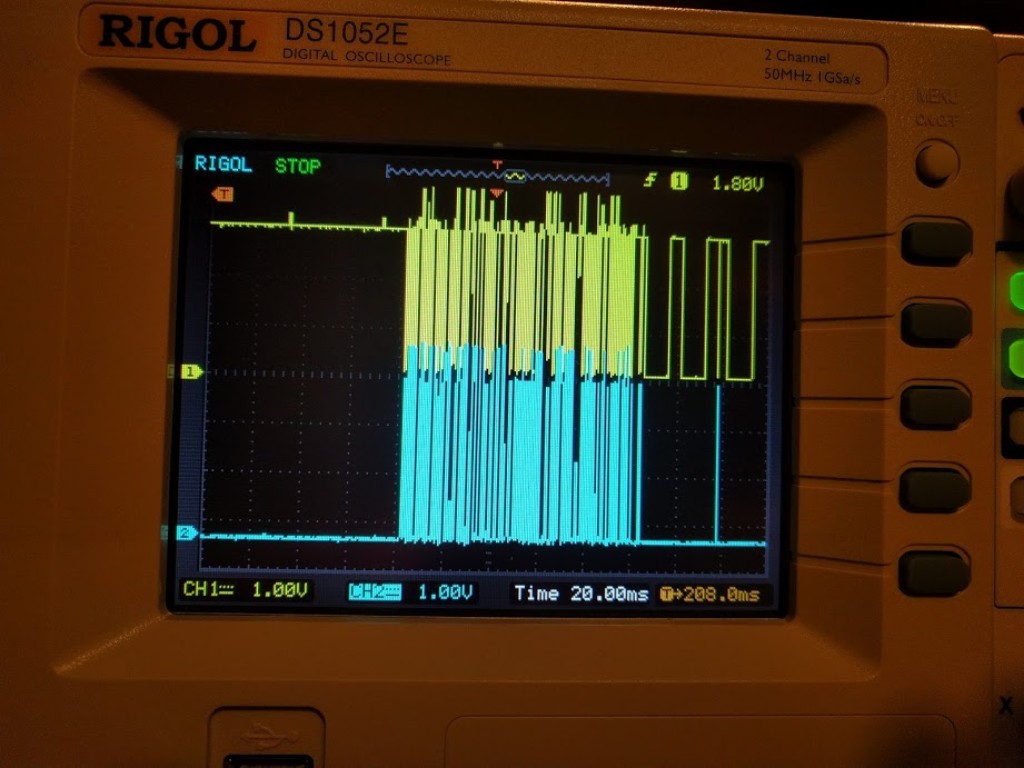
(Sometimes 3V, 3.3V or maybe up to 3.6V?)
It did work, at least once:
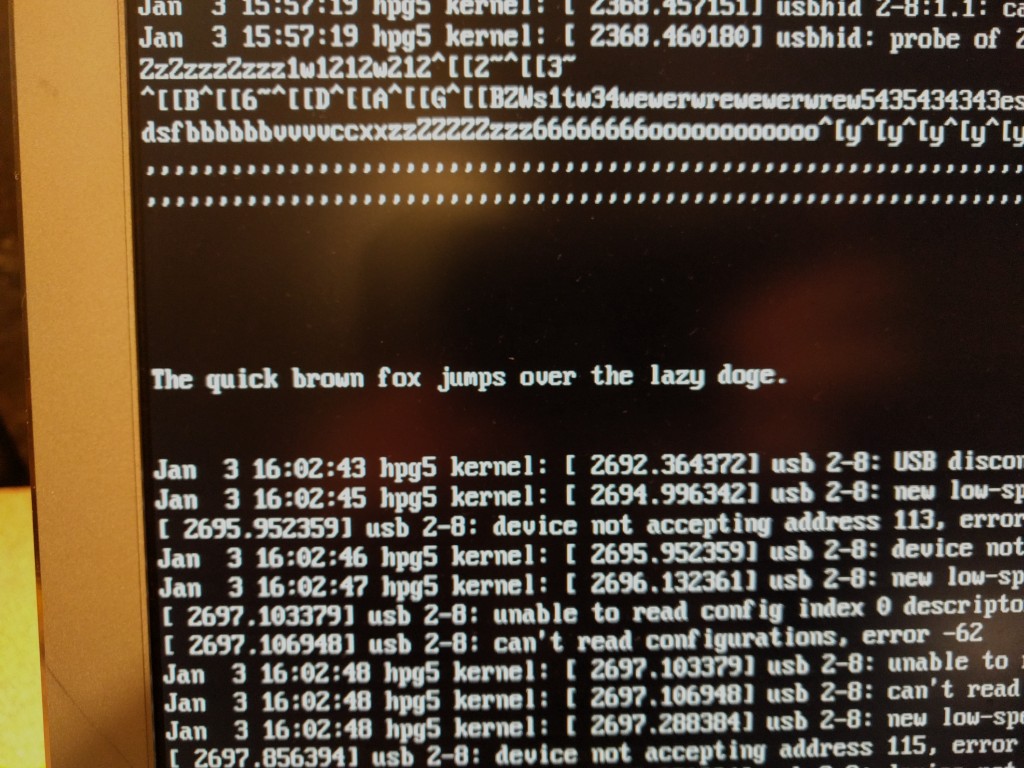
but you can see all of the kernel errors from failed negotiations in the screenshot. I think, maybe, that the wiring played a part, too:
The Second Attempt
I still had the keyboard, but I got rid of the HP. I wanted to use the keyboard with a Raspberry Pi, anyway, so PS/2 was never going to be good enough.
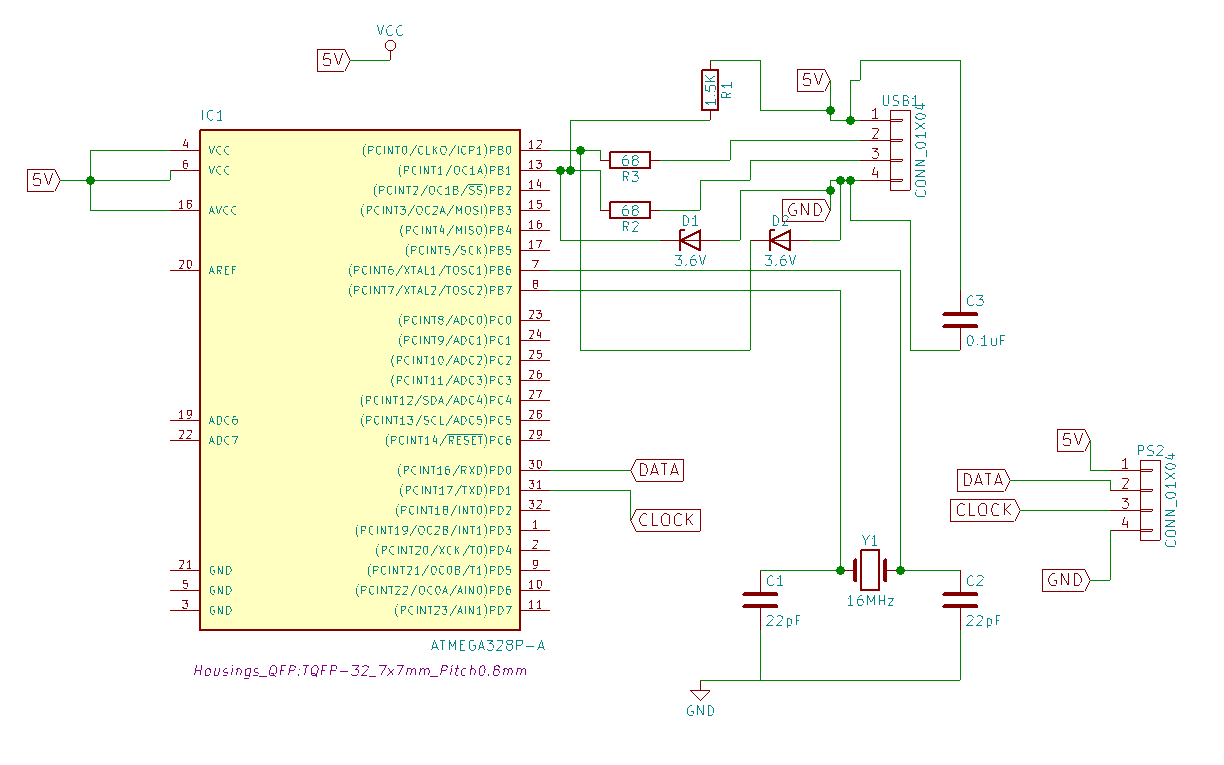
I also had some ATmega328p TQFP parts at 0.8” pitch, and a toaster oven I wanted to try out for reflowing. I took the schematic from the README:
                +---+   +---------------+
USB            GND  |   |   ATmega168   |
===                 C3  |               |
5V <-------+--------+---|Vcc,AVCC       |        PS/2
           R1           |               |        ====
D- <----+--+-----R2-----|INT1        RXD|------->DATA
D+ <----|---+----R3-----|INT0        XCK|------->CLOCK
        Z1  Z2          |               |      ->5V
GND<----+---+--+--+-----|GND            |      ->GND
               |  |     |               |
               |  C2-+--|XTAL1          |
               |     X1 |               |
               +--C3-+--|XTAL2          |
                        +---------------+
And I recreated it in Kicad:
And I even got as far as starting to mill the PCB before realising my mistake:
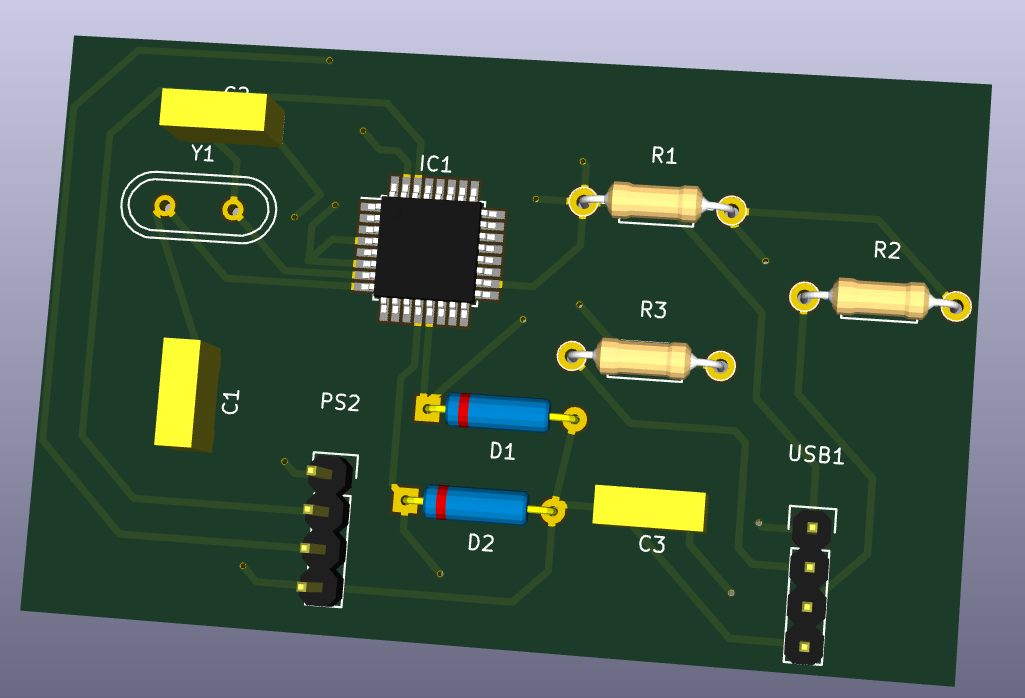
(Spoiler: There is nowhere to program the chip. I omitted ICSP pins).
The main missing part was an actual ATmega programmer, which is why the whole project took six months to finish off. I was definitely going to need to connect it somehow.
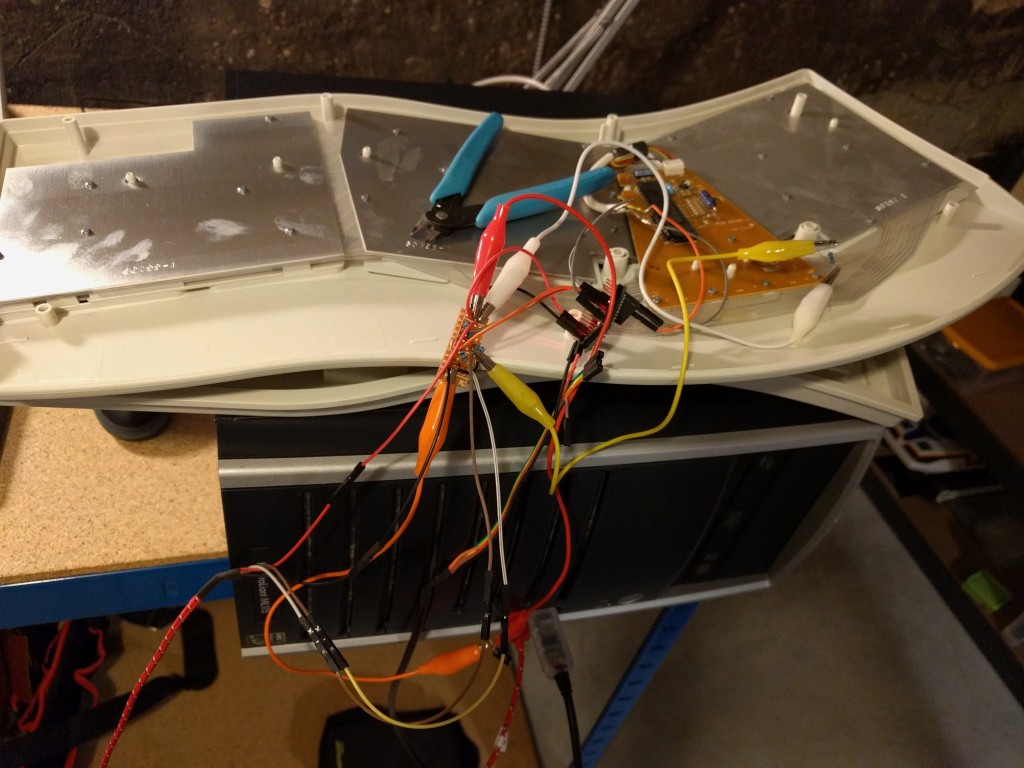
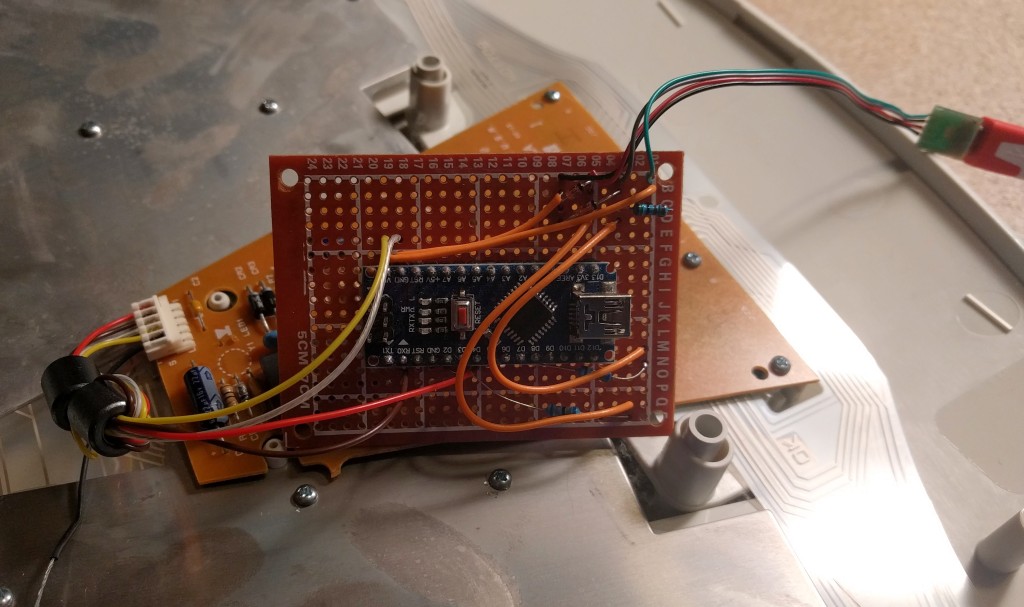
So, basically I gave up on the PCB, and decided to just sacrifice an actual Arduino clone. It’s easy to program and you can just solder it straight into some perf-board:
Just substitute the raw ATmega pin names for the Arduino equivalents:
| ATmega Pin Name | Arduino Pin |
|---|---|
| RXD | 0 |
| INT0 | 2 |
| INT1 | 3 |
| XCK | 4 |
Using a USBasp clone I wrote the firmware directly, overwriting the Arduino firmware but also getting rid of that ~1 second start-up delay which was causing so many USB errors before.
This actually worked first time, pretty unexciting stuff but I can move on with my life with a working keyboard. The only part left was to insulate the board. There is more than enough space inside the cavernous Microsoft keyboard case, but it’s also got some massive metal sheets.
This also had a quick fix:
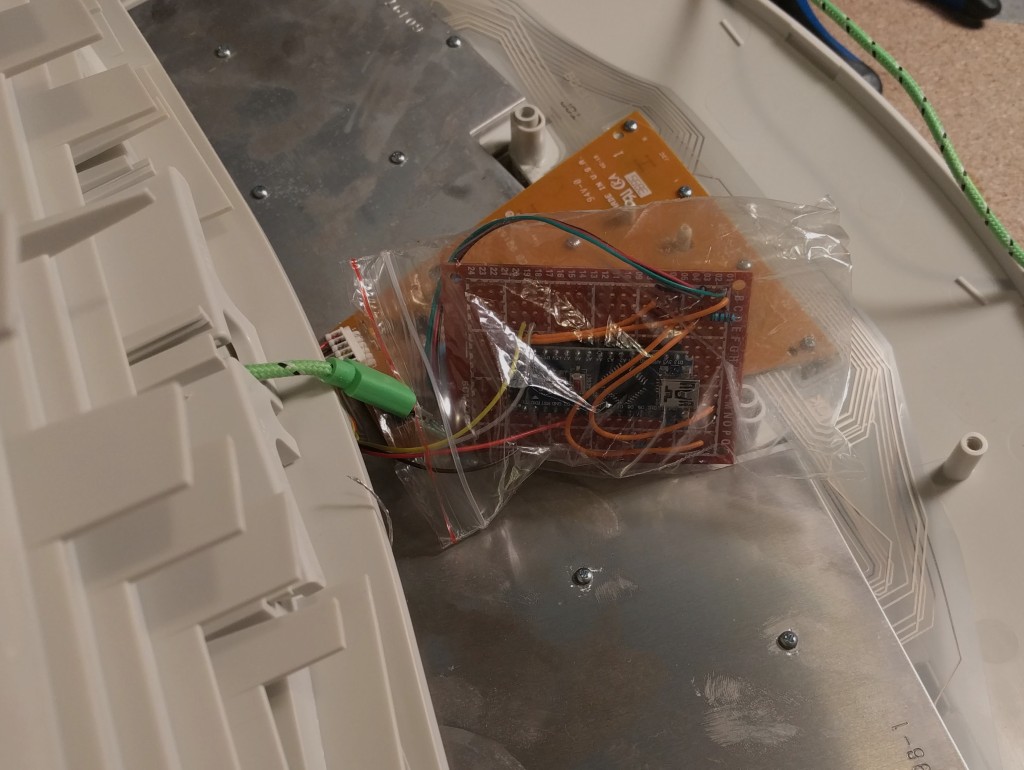
There is a lot to be said for keeping ziploc bags as quick insulation. It’s even more of a cheat that wrapping everything in heat-shrink tubing.